
How to use BillMyWeek
From sign-up to your first PDF invoice in a few minutes. Watch the 2-minute walkthrough, or follow the steps and screenshots below. The demo uses a made-up account.
Steps
- Create your account
- Setup wizard: your details and bank details
- Invoice defaults: numbering and payment terms
- Your rates: day rate, standard hours and multipliers
- Add a client
- Create an invoice from the issue date
- Enter hours and overtime
- Check the due date and total
- Save, preview and download the PDF
- Mark it sent, then paid
- Make it yours: colour, font and logo
- Export your data any time
1Create your account
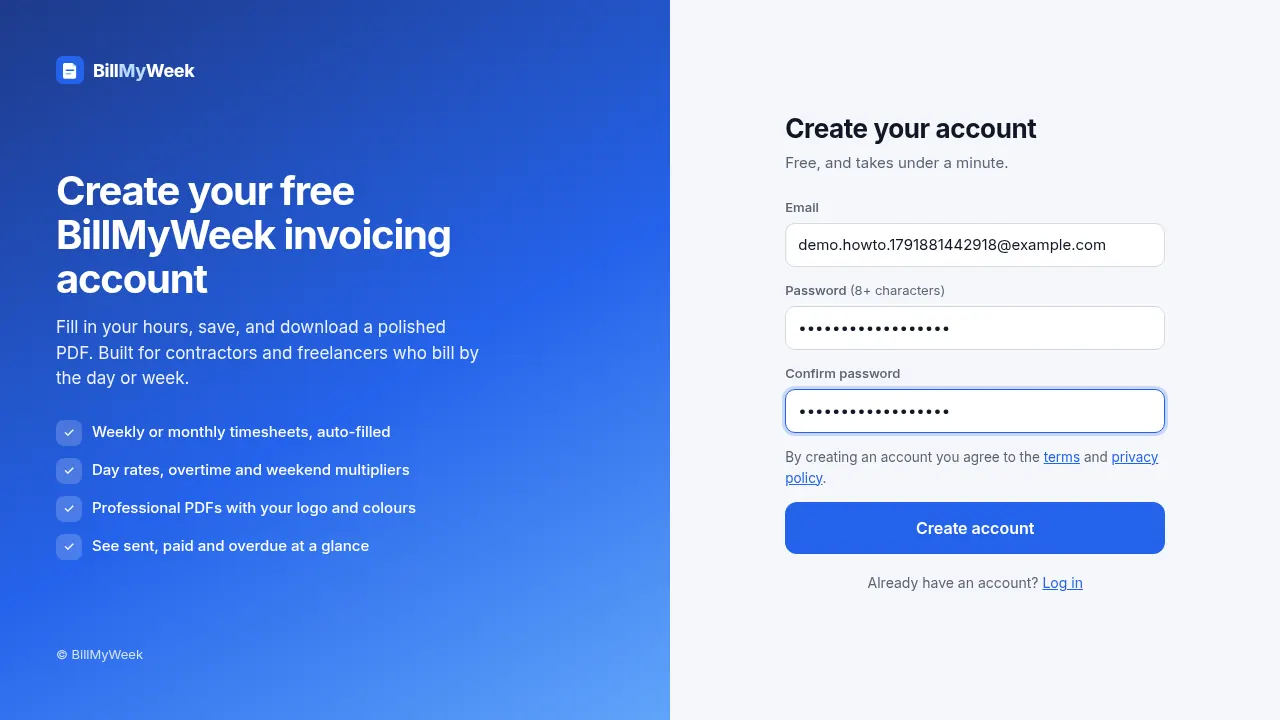
Click Sign up and enter your email address and a password (at least 8 characters). If Google sign-in has been enabled on the site, you'll also see a Continue with Google button.
2Setup wizard: your details and bank details
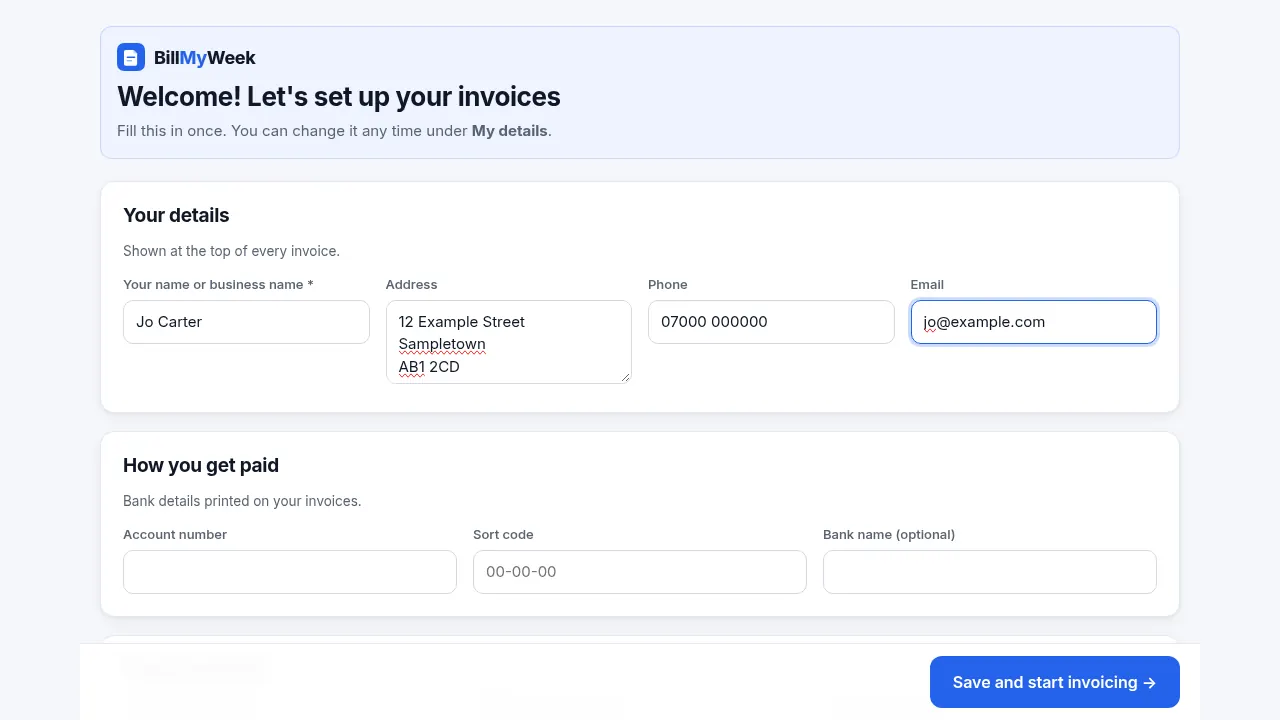
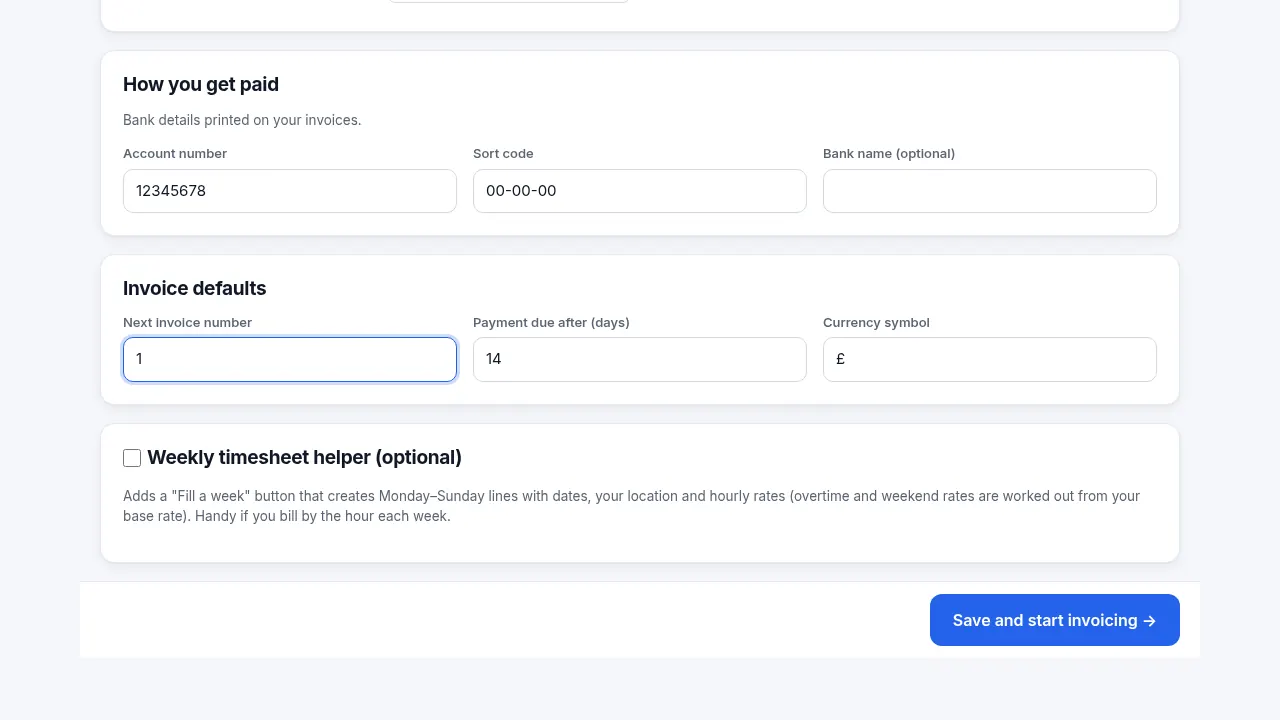
The first time you log in, a short setup page asks for your name or business name, address, phone and email (shown at the top of every invoice). It also asks for your bank account number and sort code, which are printed on every invoice so clients know how to pay you. You can change any of this later under My details.
3Invoice defaults: numbering and payment terms
Set the next invoice number (handy if you're carrying on from invoices you've already sent; numbers then go up automatically), the default payment terms in days, and your currency symbol.
4Your rates: day rate, standard hours and multipliers
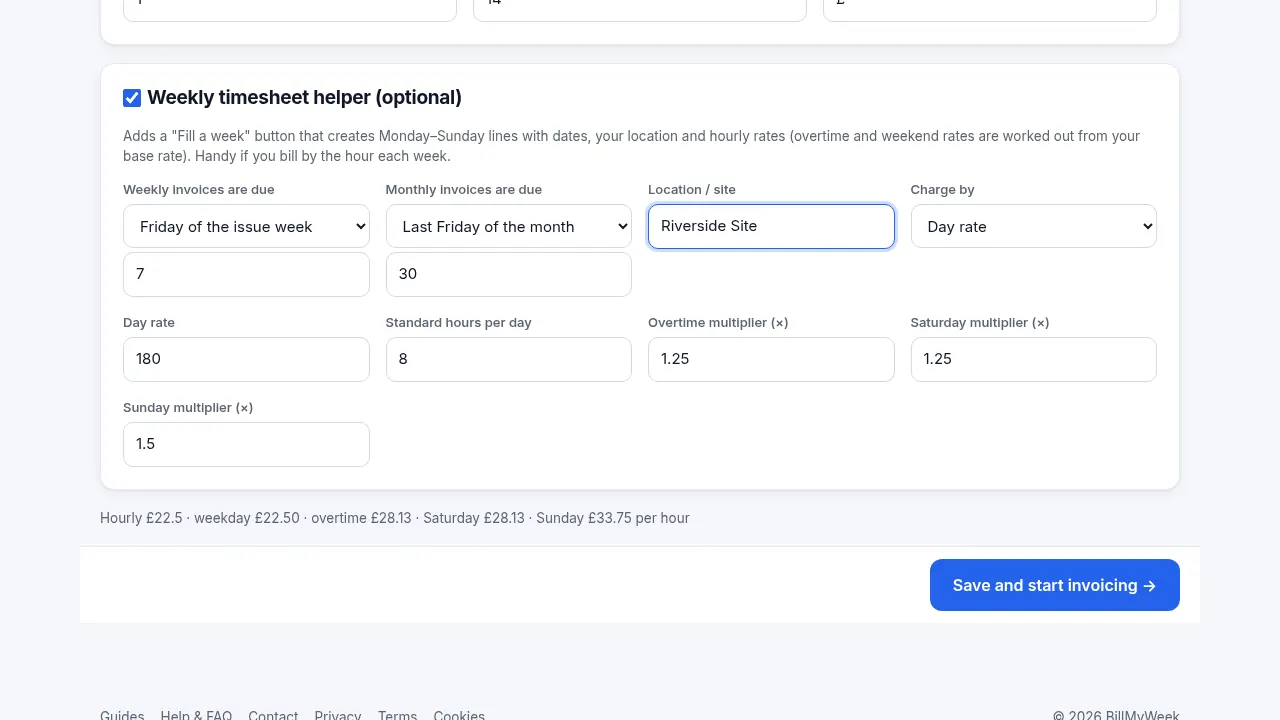
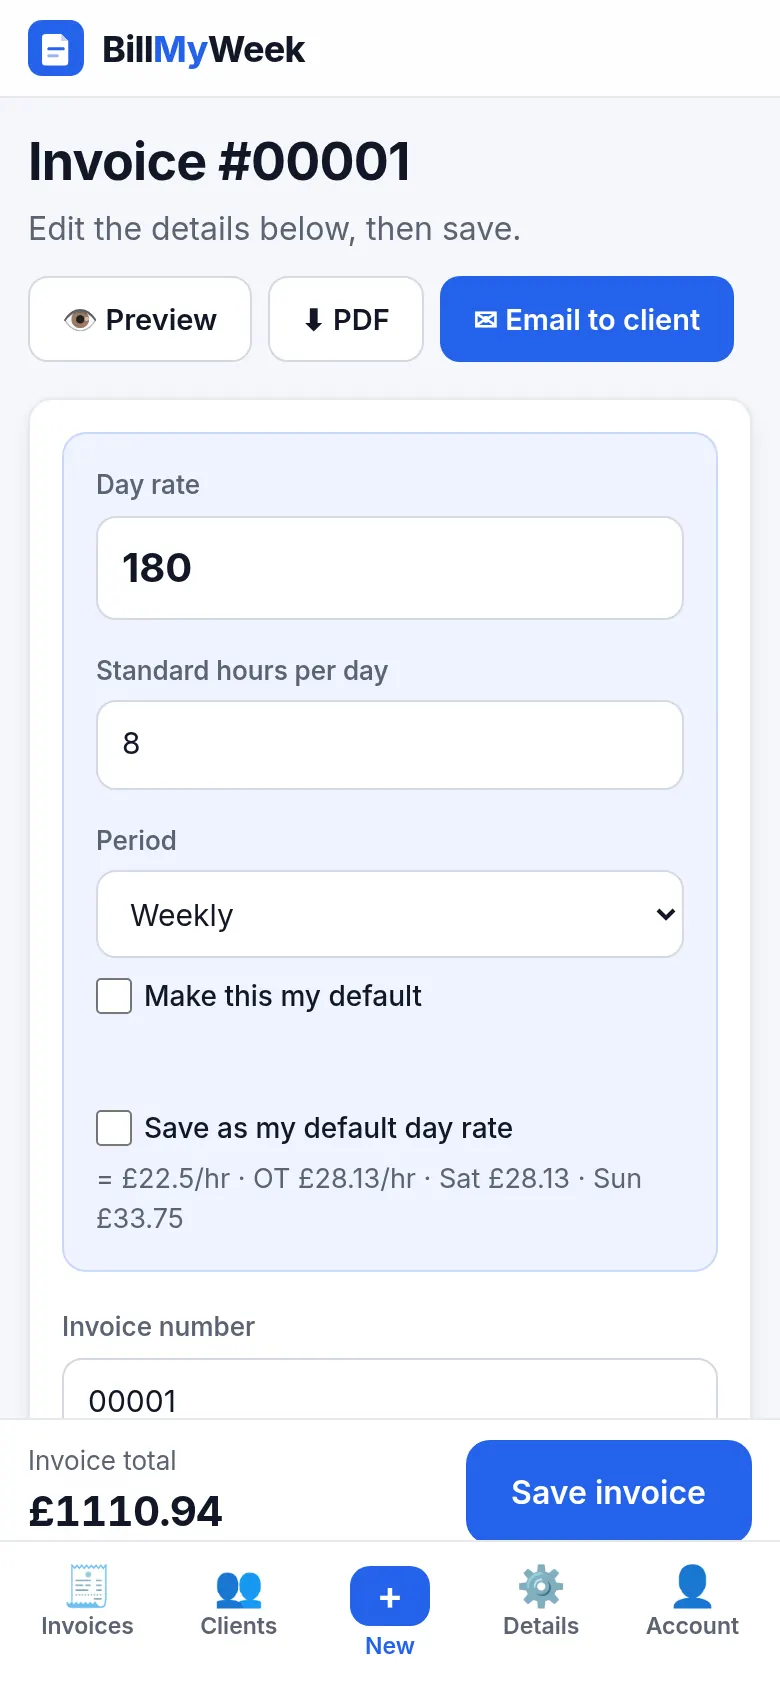
Turn on the weekly timesheet helper and choose to charge by day rate or by hourly rate. With a day rate, enter it along with your standard hours per day (8 by default). The hourly rate is the day rate divided by the hours, so a normal day always equals your day rate exactly. Then set your overtime, Saturday and Sunday multipliers (defaults ×1.25, ×1.25 and ×1.5). A live line underneath shows the resulting hourly rates. You can also set a default location and choose when weekly and monthly invoices are due.
5Add a client
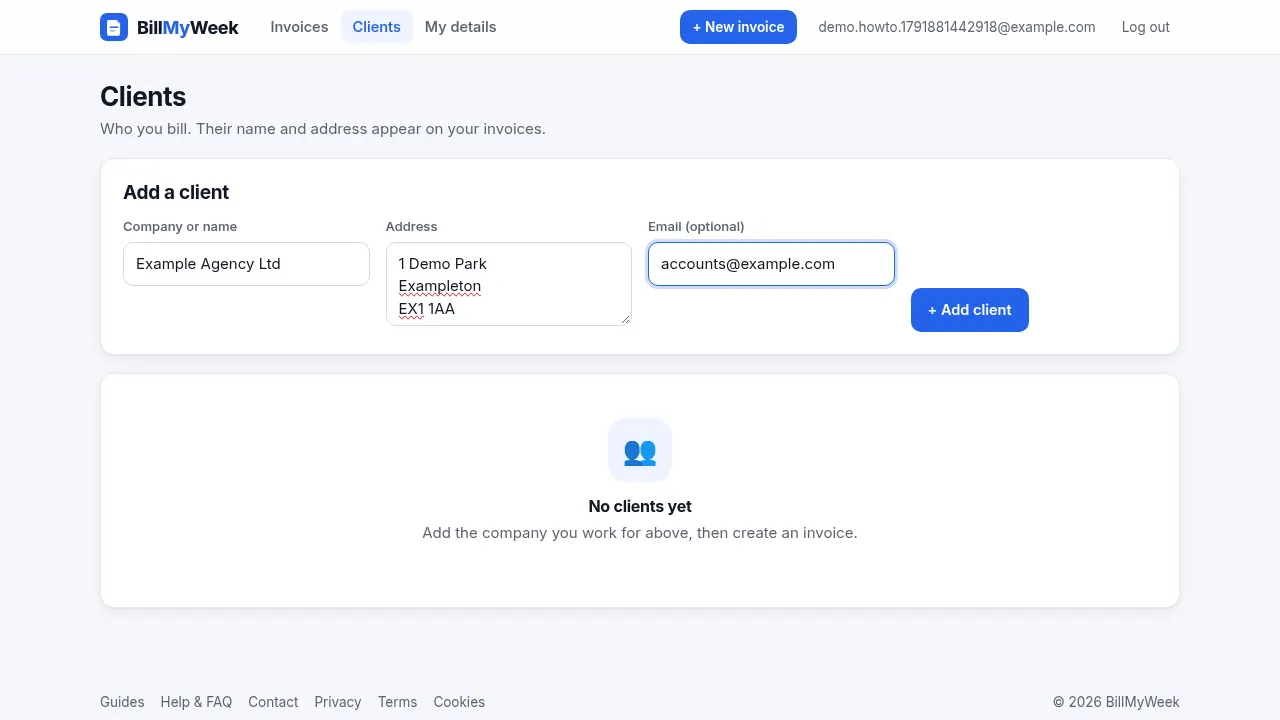
Go to Clients and add the company you bill: its name, address and (optionally) an email address. Saved clients appear in a drop-down when you create an invoice.
6Create an invoice from the issue date
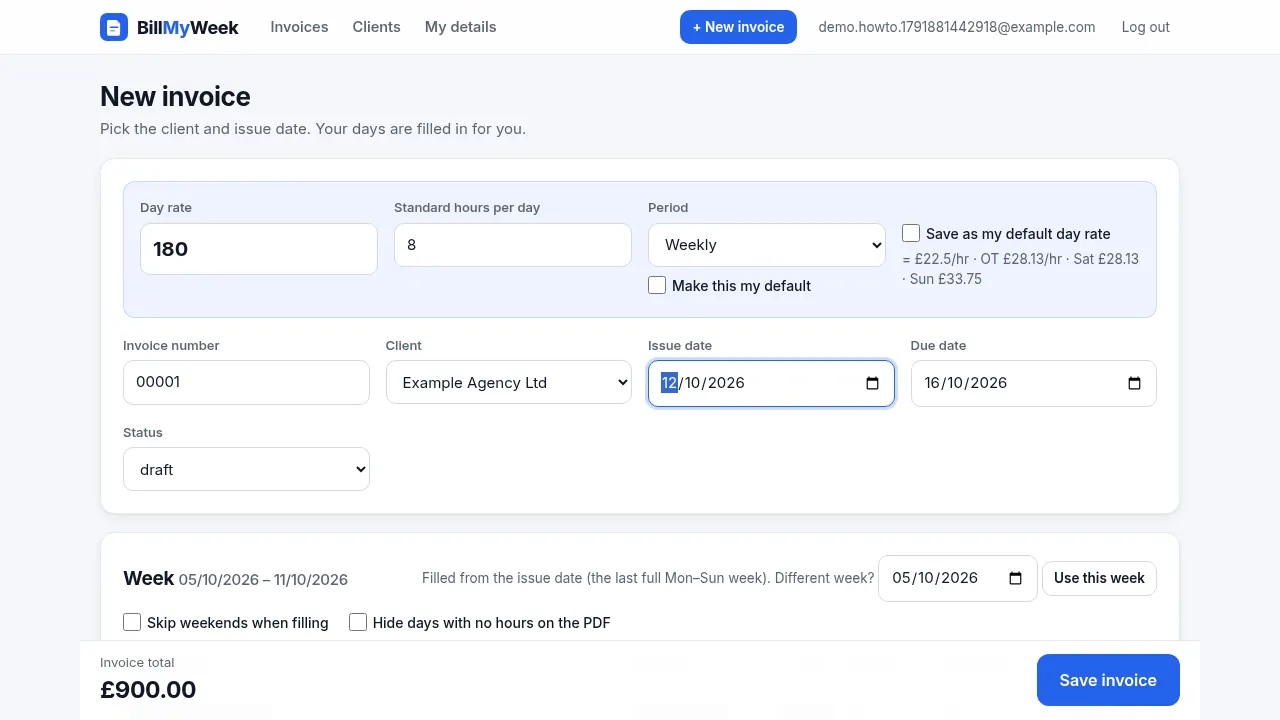
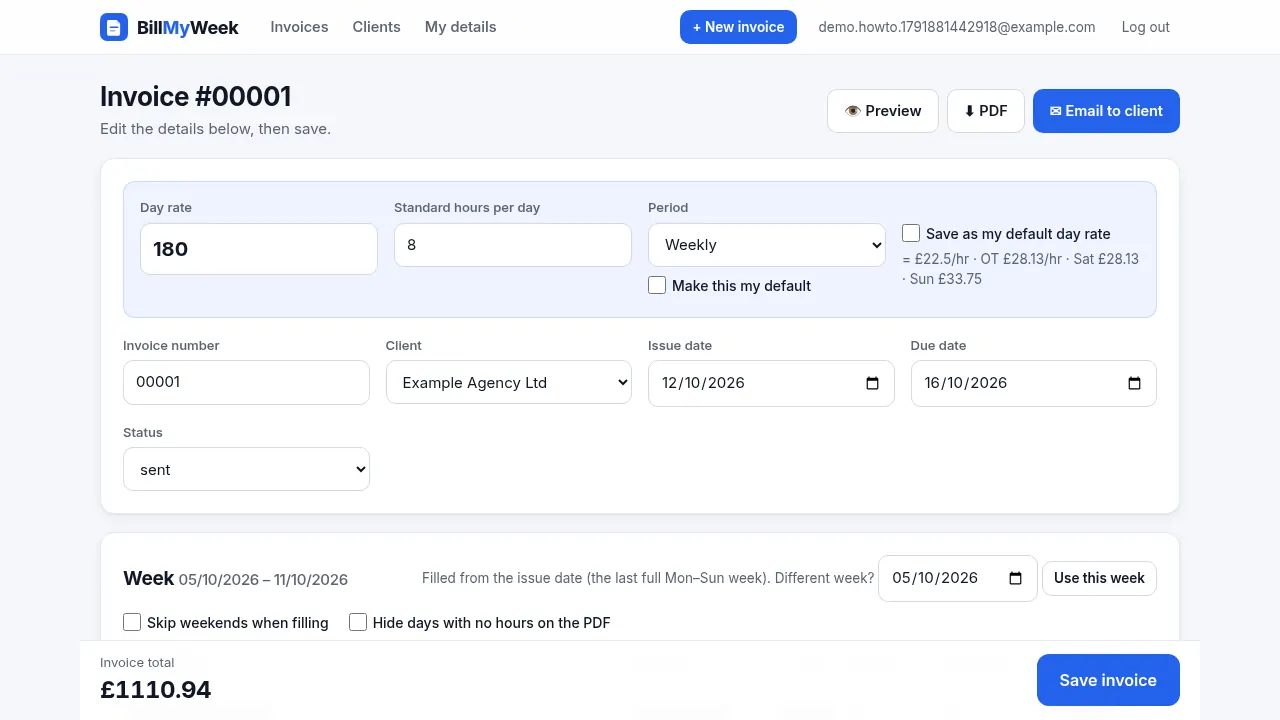
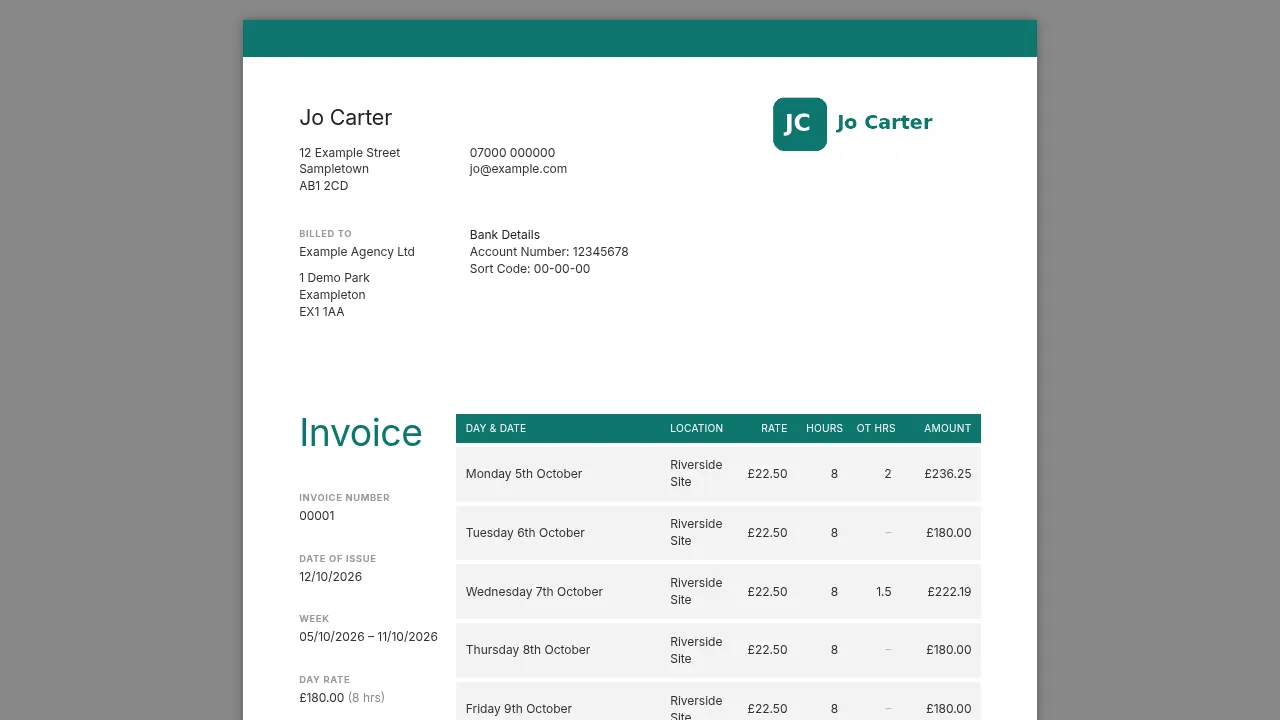
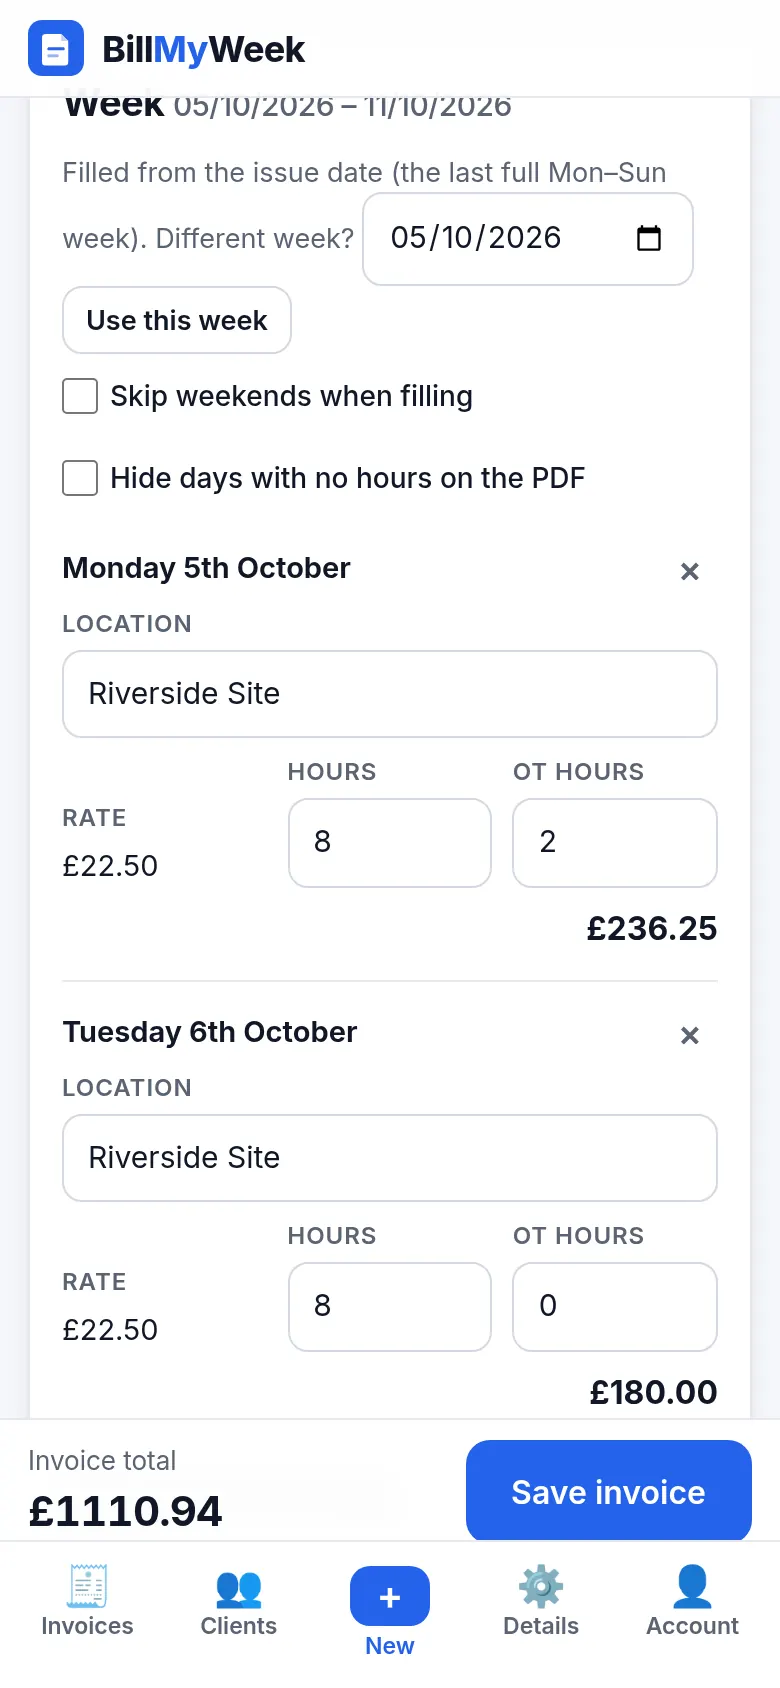
Click + New invoice, pick the client and set the issue date. Choose Weekly or Monthly. Weekly fills the last full Monday–Sunday week before the issue date (an invoice issued on Monday 12 October covers 5–11 October). Monthly fills the previous complete calendar month. Each day gets a row with its date, your default location and rate. You can pick a different week or month, skip weekends, or hide days with no hours on the PDF. The day rate at the top can be changed for one invoice or saved as your new default.
7Enter hours and overtime
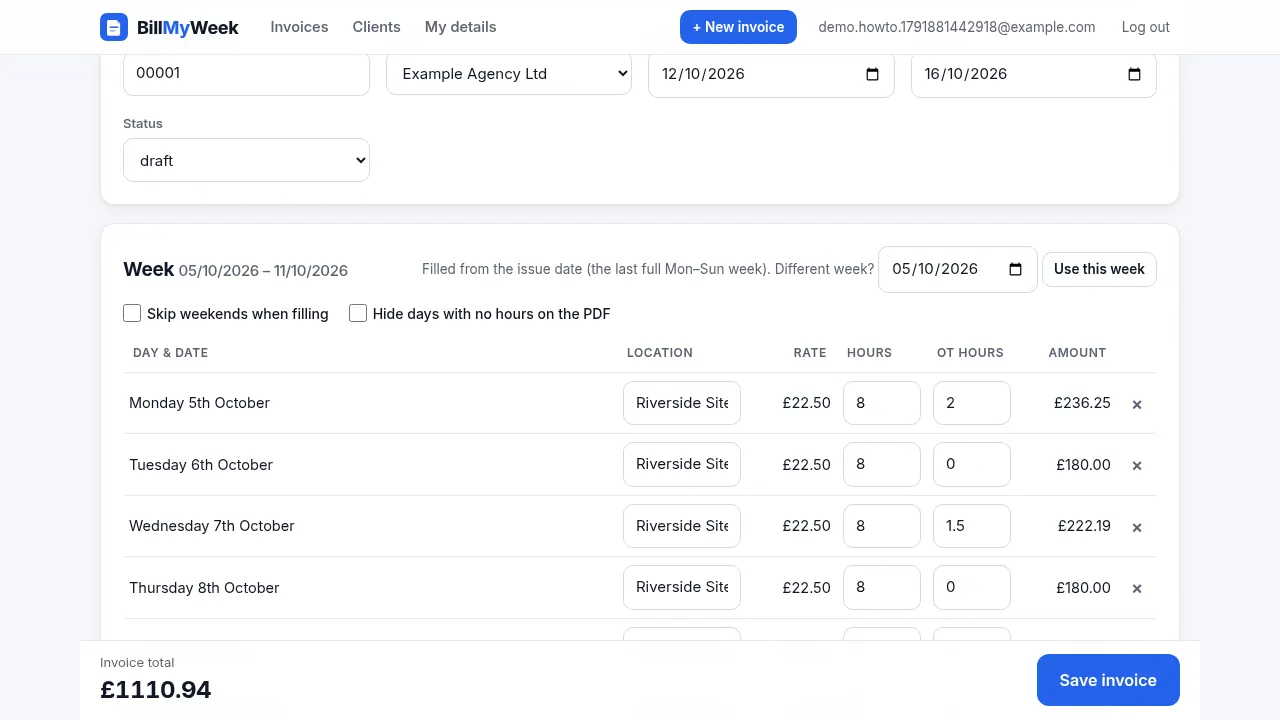
Type the hours for each day and any overtime hours. Saturday and Sunday rows use your weekend multipliers automatically. Every line is worked out from the full-precision hourly rate and rounded to the penny, and the total updates as you type. You can add extra lines too, for example for materials or expenses.
8Check the due date and total
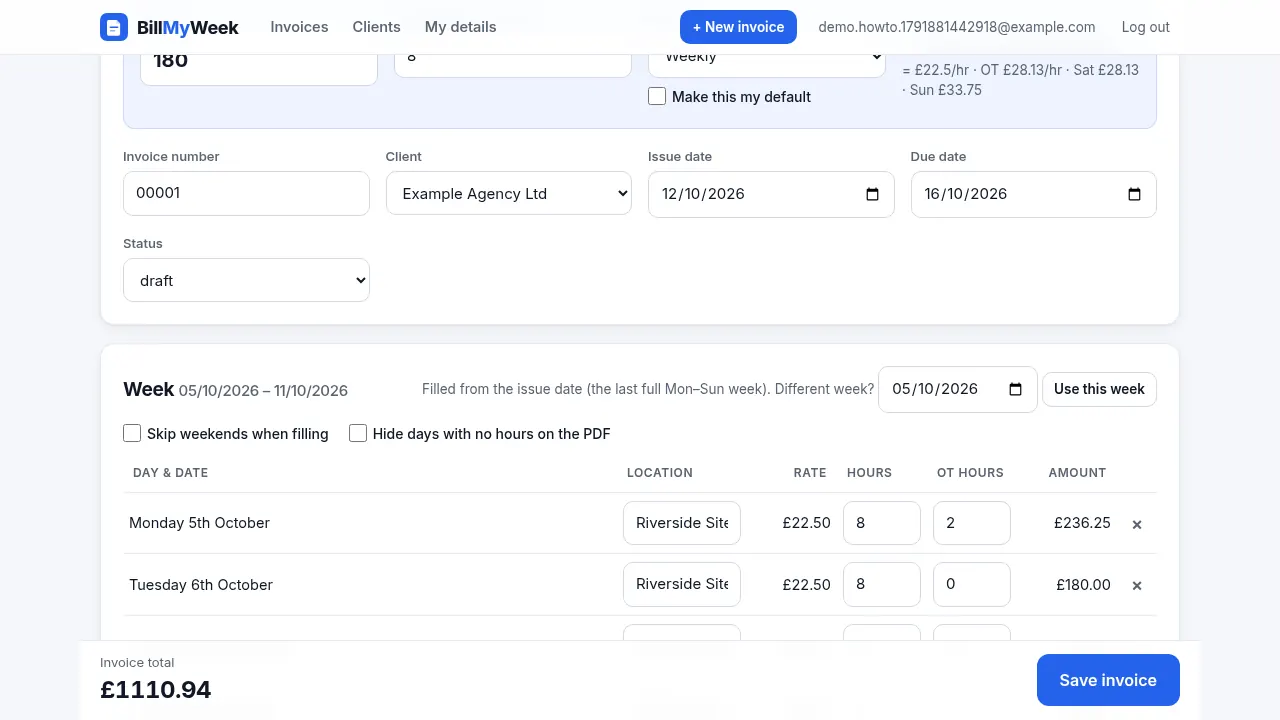
The due date is set for you. For weekly invoices it's the Friday of the issue week by default, and monthly invoices follow your chosen rule. It updates if you change the issue date or period, and you can always overwrite it. The invoice total stays visible in the bar at the bottom of the screen.
9Save, preview and download the PDF
Click Save invoice. You can then Preview the A4 invoice or download the PDF. The file is named after you, the client and the invoice number, for example
Jo Carter Example Agency Ltd Invoice 1.pdf. If email sending has been enabled on the site, there's also an Email to client button that sends the PDF and marks the invoice as sent.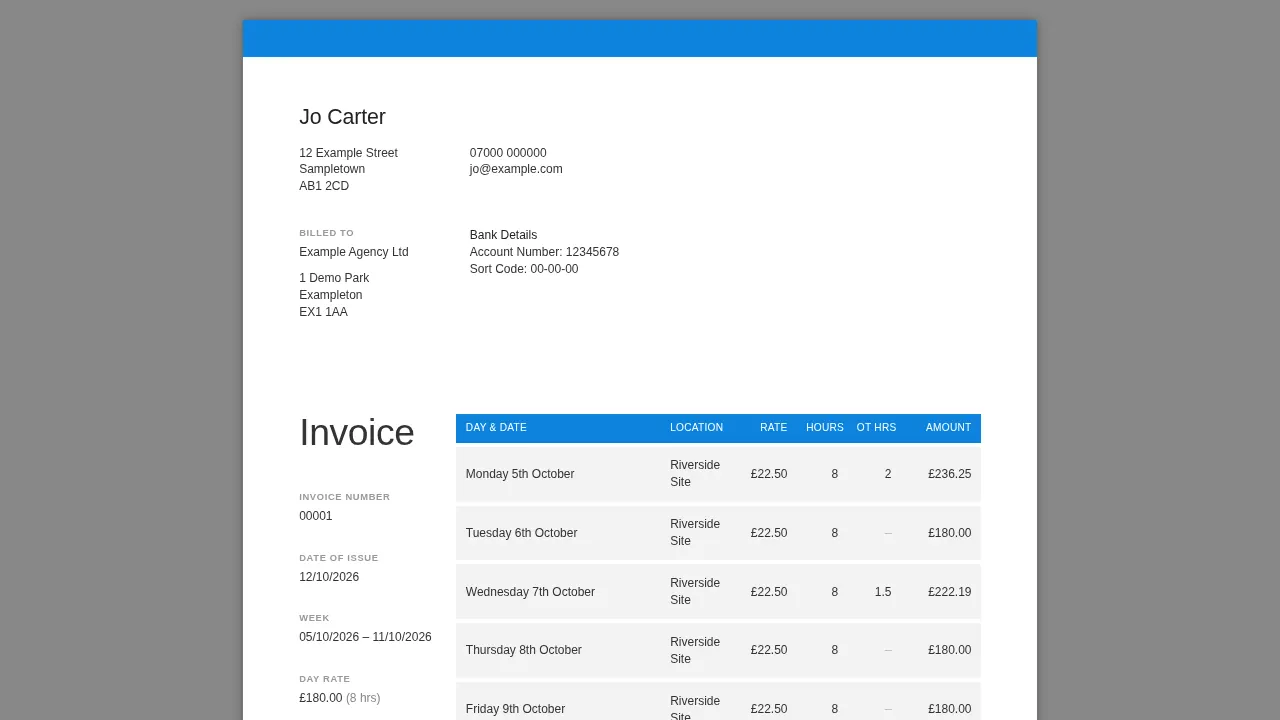
10Mark it sent, then paid
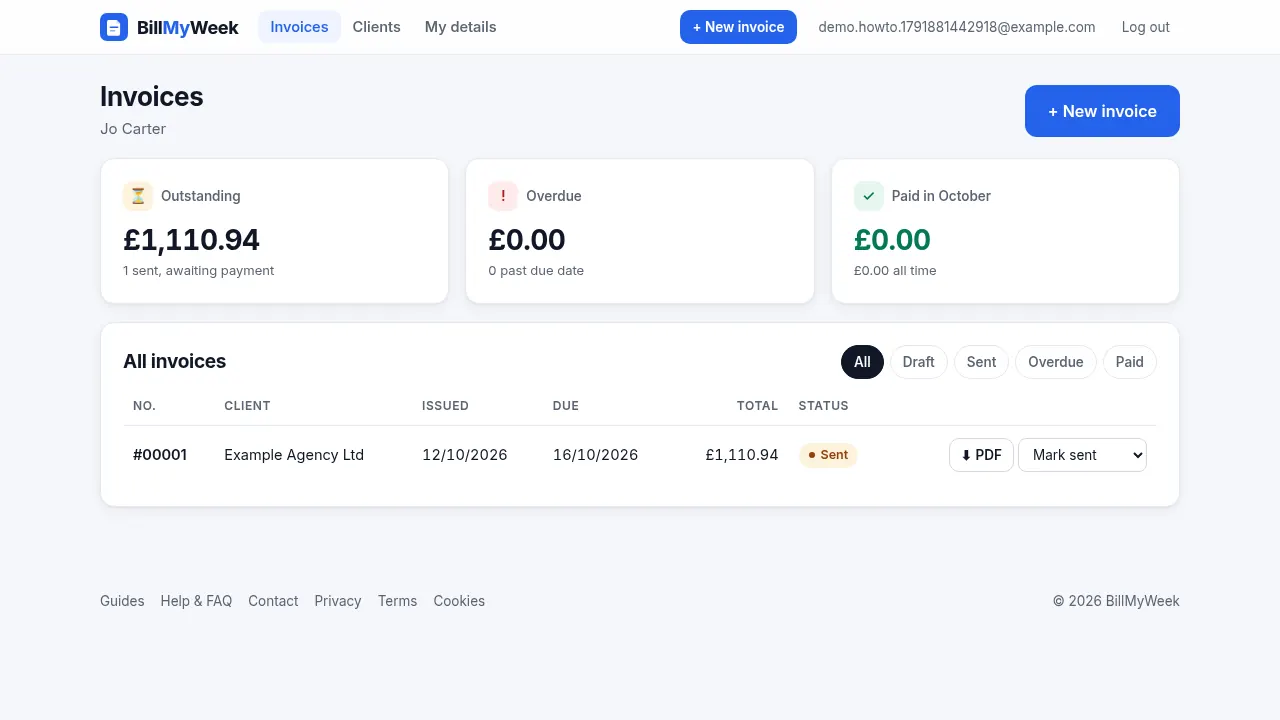
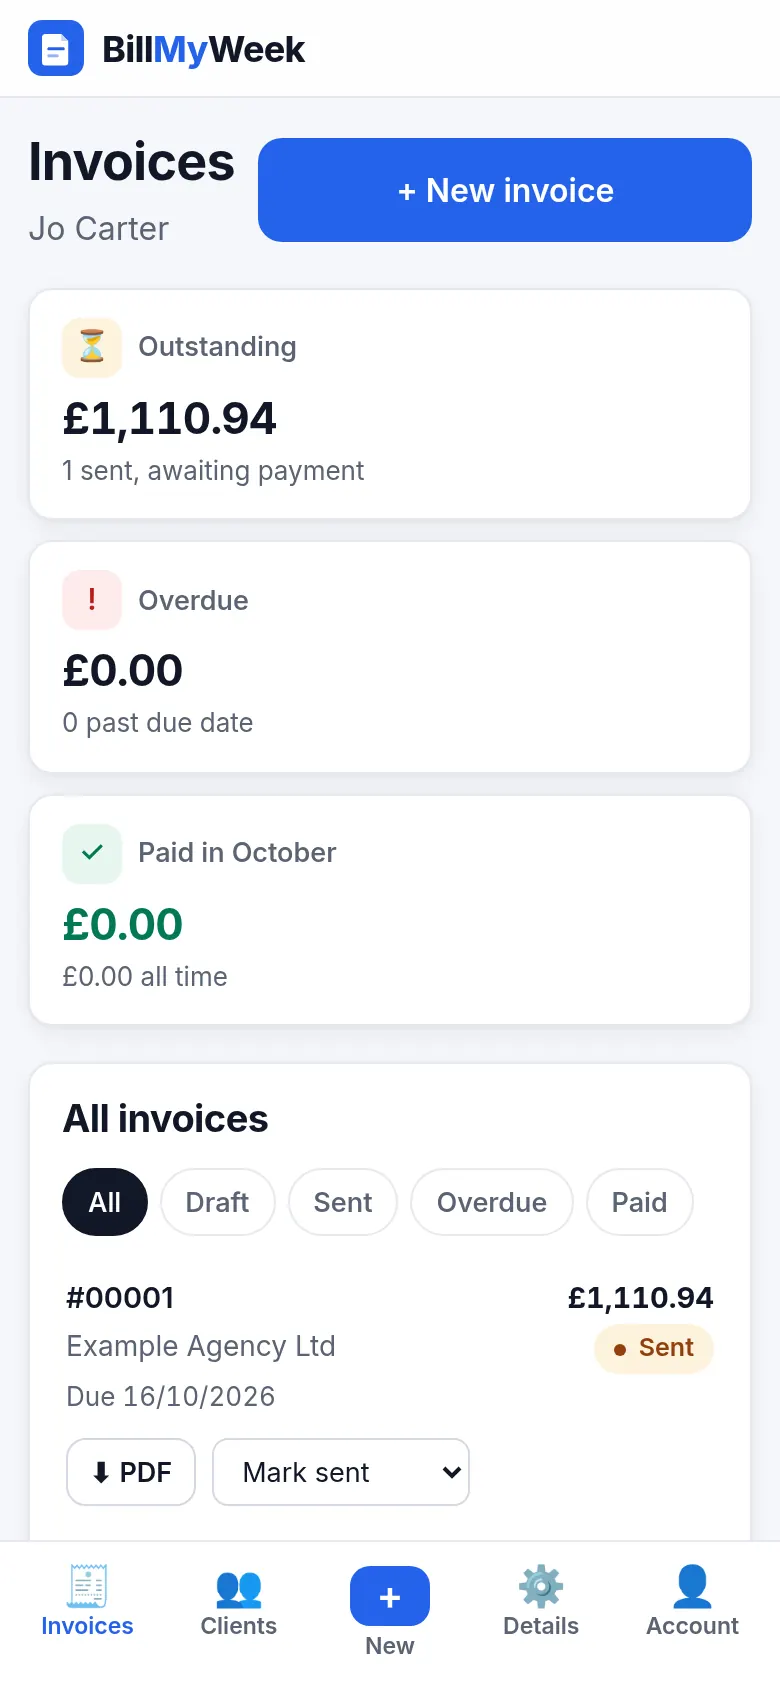
Each invoice has a status: draft, sent or paid. Set it to sent when you send it, and to paid when the money arrives. The Invoices dashboard shows what's outstanding, what's overdue (highlighted) and what's been paid this month.
11Make it yours: colour, font and logo
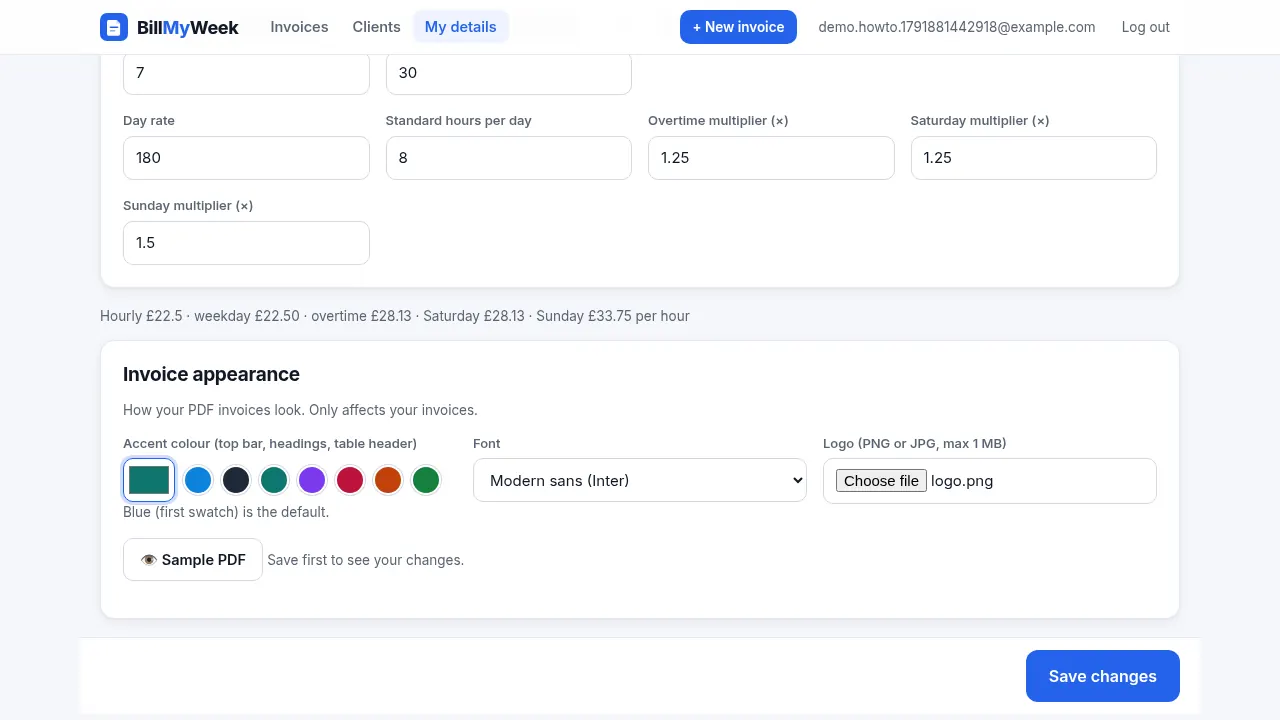
Under My details → Invoice appearance, choose an accent colour (or a preset swatch), one of the fonts, and optionally upload a PNG or JPG logo. Use the sample PDF button to check the result. Your choices apply to all your PDFs and don't affect anyone else.
12Export your data any time
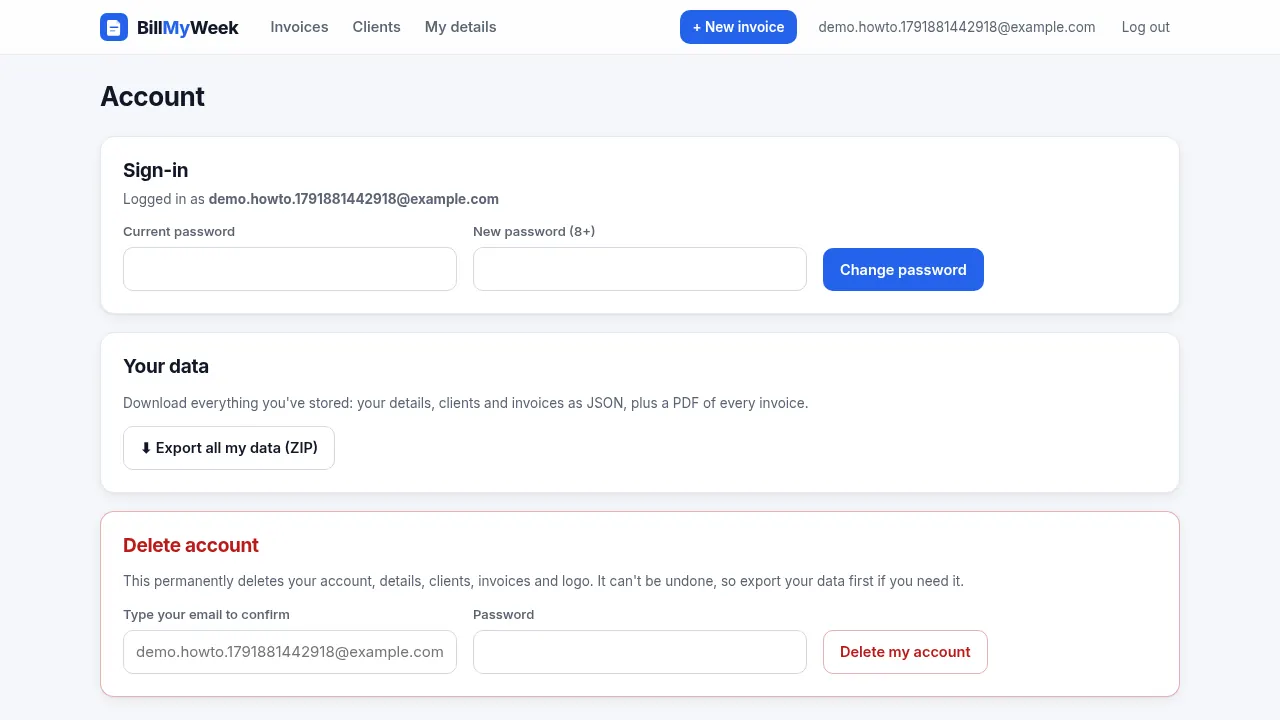
On your Account page, Export all my data downloads a ZIP with all your details, clients and invoices as JSON, plus every invoice as a PDF. You can also change your password or delete your account there.
On your phone
Everything works in a mobile browser. The menu moves to the bottom of the screen, and each day becomes a card with big inputs.
Questions
Is BillMyWeek free?
It's free while in beta (testing). We plan to keep a free plan and add an optional paid plan later. Nothing is charged now, and no card is needed.
Can I use it on my phone?
Yes. The site works in any modern mobile browser, and on small screens each day becomes a simple card with the hours and overtime fields.
Can I change an invoice after saving it?
Yes. Open it from the Invoices list, edit it and save again. Your existing invoices keep their numbers.
Does it work out VAT or CIS deductions?
No. BillMyWeek doesn't calculate VAT or CIS deductions. It's built for straightforward weekly and monthly invoices.
Can I sign in with Google or email invoices from the site?
Only if those features have been enabled on the site. Until then, use email and password to log in, download the PDF and attach it to your own email.
More answers on the Help & FAQ page, or browse our invoicing guides.
Ready to try it?
It's free while in beta and takes about a minute to set up.
Create your account